When it rains, it pours. Unfortunately, this saying also applies to your home’s roof. If a leaking roof is caught early, it’s usually easy to repair yourself.
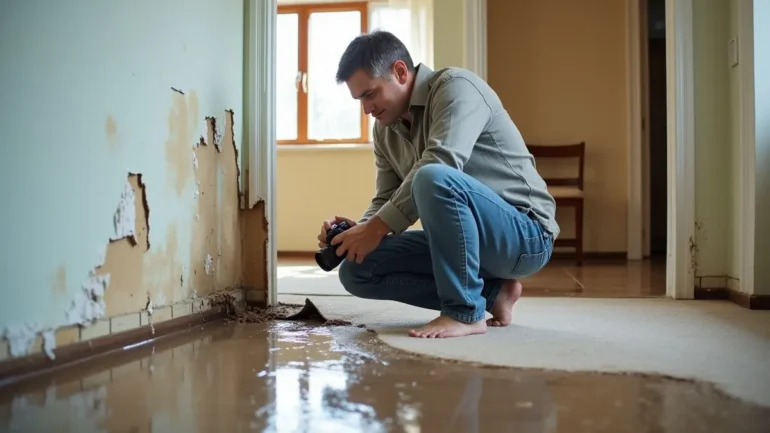
However, when that leak continues to get worse and you ignore it for too long, things start to get ugly. Your ceiling may begin to show signs of mold or water damage as well as costly repairs like a new roof or even structural repairs may be necessary.
If you are beginning to see the warning signs of a leaking roof, we know how you feel. It is one of the most common problems that homeowners face in Chicago because of our humid summers and cold winters. You might think that any leaky roof is an easy repair job but trust us – they get much more difficult if left untreated for too long.
The good news is that many homeowners have tackled this issue before and have come out stronger on the other end! With some patience and perseverance, you can tackle this project with ease as well – read on for tips from our leaking roof in Chicago repair experts!
Identifying Leaking Roof
There are several reasons why a roof leak occurs. However, the first step toward repairing your roof is to identify where the leak is coming from.
There are three main areas on your roof where you will likely find a leak:
- Snow/Ice Removal – Snow and ice are heavy and can weigh down the roof, causing it to bow and make larger holes in the shingles when it melts. Remove snow and ice from your roof as soon as it is safe to do so to avoid any extra damage.
- Flashings – Flashings are the metal or plastic pieces that go around the edge of your roof, diverting water away from your home. Flashings are notorious for rotting out and becoming loose over time, which results in water infiltrating your home.
- Gutters – The purpose of gutters is to channel away rainwater that might otherwise seep into your home and direct it away from your home. However, debris may block the gutters, causing a backup and leakage.
Small Repairs to Fix a Leaking Roof
If you find that your roof is leaking and you can see the source of the problem, you may be able to fix the leak yourself!
- Remove debris or debris build-up from gutters or downspouts. If your gutters are clogged with leaves and debris, water will not be able to be properly diverted away from your home. This will cause a backup and may leak into your home. Clean your gutters out every fall to avoid this problem!
- Check to flash and replace any rotted pieces. Flashing is a crucial part of roofing that diverts water away from your home. They can become bent or broken over time due to weather and age. Repairing or replacing these pieces can save you a ton of money in repairs!
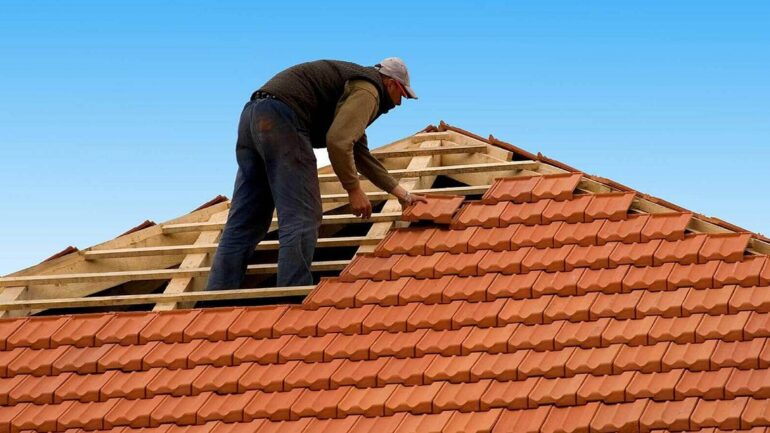
- Repair any broken tiles or shingles. If there are broken tiles or shingles on your roof, water may be able to get into your home and cause a bigger issue.
- Patch any holes in your roof. If you notice any holes in your roof, they may be able to be patched. Make sure that you seal the hole tightly, but do not use any roof sealant. Roof sealant is designed to be permanent and will not be able to be removed in the future when you need to replace your roof.
Repairing a Loose Flashing
If you have tried making small repairs to your roof and they have not worked, you may need to replace a flashing. Flashings are important parts of your roof that divert water away from your home and are often loose or broken from age or weather.
To repair loose flashing, you will need to get up on the roof. Some flashings can be repaired from the ground, but others will need to be replaced. Follow these steps to repair a flashing:
- Use a crowbar to remove the old flashing. Use the crowbar to pry out the old flashing. Be careful when doing this so you do not damage the shingles below.
- Clean the area around the flashing. You will want to make sure that you clean the area well so that no debris will hold the new flashing in place.
- Measure the new flashing and cut it to size. Make sure to use a marker that is visible from the ground so you know where to put the new flashing when you go back down the roof.
- Put the flashing in place and seal it with roofing cement. Make sure to put the flashing in the correct spot. You may want to use a level to make sure it is straight.
Patching a Chipped or Broken Tile
Unfortunately, some tiles that are damaged are beyond saving. However, if you discover a single cracked tile, you may be able to repair it using roof cement, which is intended for use on the roof. Follow these steps to patch a broken tile:
- Make sure that the broken tile is clean. You will want to make sure that the tile is clean before you start to make sure that the cement will stick to it properly. You can use water or a mild cleaner to clean the tile.
- Use roof cement to apply a patch to the tile. Make sure that you apply enough so that the patch is smooth and covers the chipped area.
- Let the roof cement dry. You can use a heat gun or a hair dryer to help it dry more quickly.
- Cover the patch with shingles. You can use a shingle patch or a shingle lifter to cover the patch with shingles to make it look like nothing ever happened.
Conclusion
Regular maintenance is important for maintaining the integrity of your house’s roof. If you notice any signs of a leak, begin repairs as soon as possible to keep water from getting inside your home.
Roof leaks can cause extensive damage if not taken care of quickly. They can lead to mold growth, wood rot, and even structural damage. Roof leaks are often easy to fix, but you should always hire a professional if you notice significant damage.